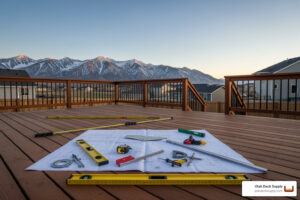
Planning a cable railing project? Getting the right supplies—from posts and cables to fittings and tools—makes the difference between a clean, code-compliant install and costly delays. This guide shows you exactly what to buy, how to choose between hardware options, and where Utah Deck Supply can help you finish flawlessly.
Your Complete Checklist for Cable Railing Supplies
Cable railing supplies are the backbone of any sleek, modern deck or balcony project—combining safety, durability, and unobstructed views that clients love. But when you’re working on a high-end job, the last thing you need is a missing fitting, incompatible hardware, or a big-box store that can’t answer basic questions about tensioning systems. This guide breaks down exactly what you need, from posts and cables to fittings and tools, so you can source the right supplies, keep your crew moving, and deliver flawless results every time.
Here’s what you need for a complete cable railing system:
- Posts – Wood, metal, or composite, chosen based on your deck frame and aesthetic
- Cable – Typically 1/8″ or 5/32″ diameter T316 stainless steel for corrosion resistance
- Fittings – Swaged (crimped) or swageless (hand-tightened) terminals and tensioners
- Top rail – Aluminum or wood cap rail for a finished look and added strength
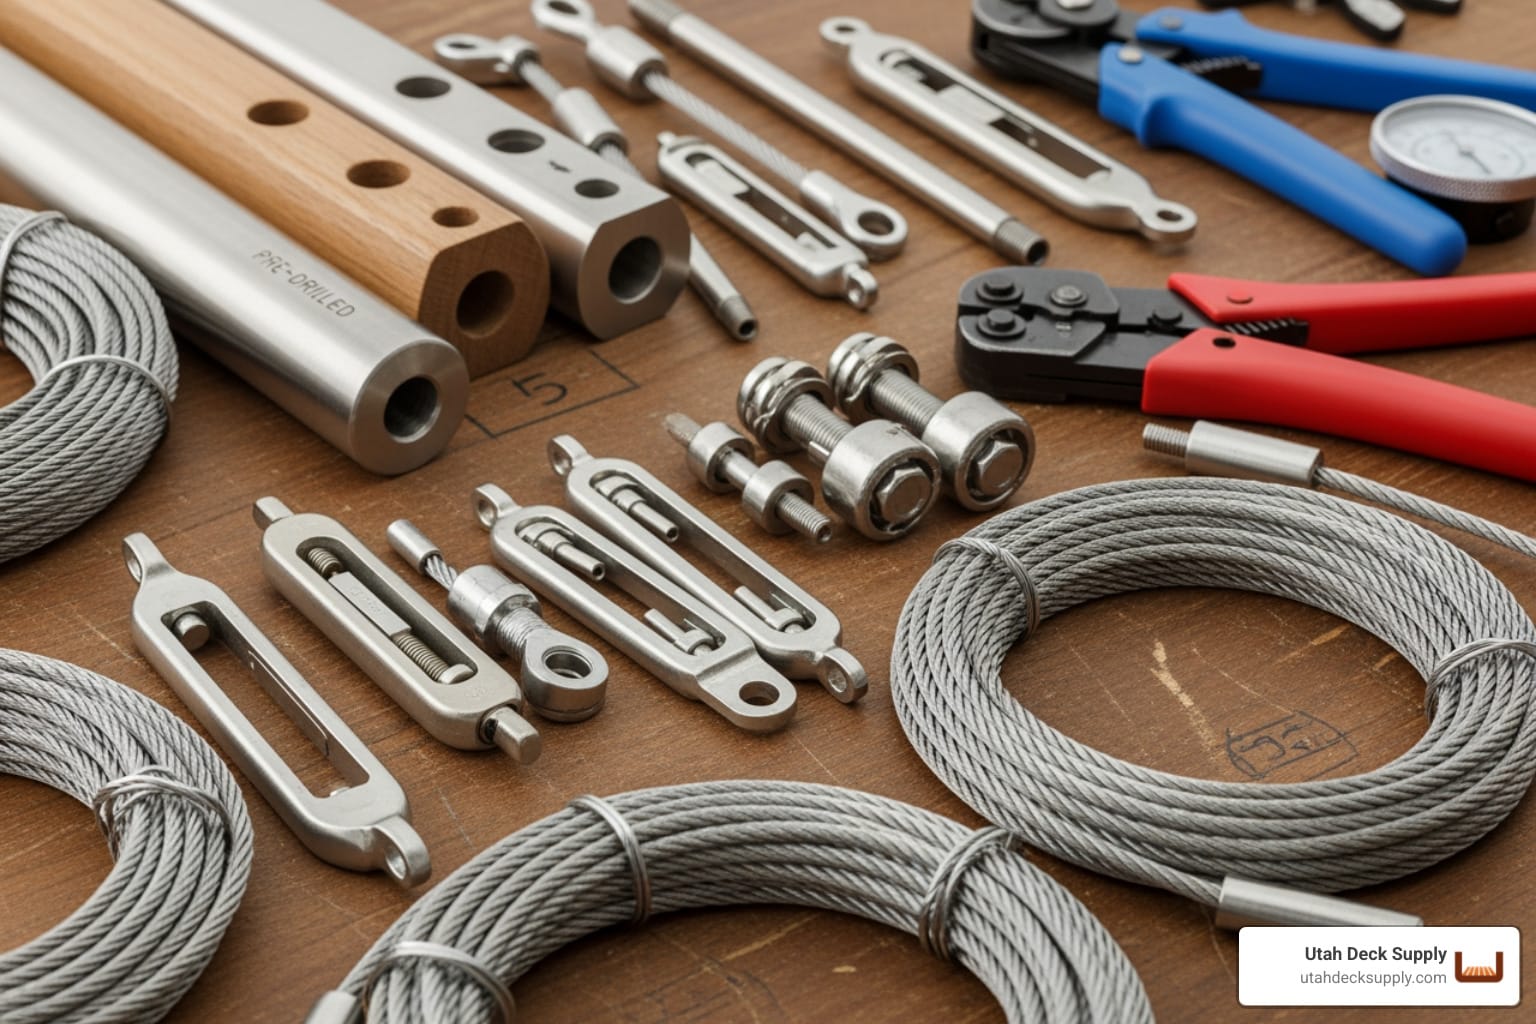
- Hardware & tools – Cable cutters, tensioning wrenches, protective sleeves, and spacer bars
- Accessories – Post hole covers, washers, and angled fittings for stair installations
The global cable railing market was valued at $1.2 billion in 2022 and is expected to reach $2.1 billion by 2030, driven by demand for modern aesthetics and low-maintenance systems. DIY-friendly swageless hardware has made cable railing more accessible than ever, but professional contractors still prefer the clean, permanent look of swaged fittings for high-end projects.
I’m James Bonham, co-founder of Utah Deck Supply, and I spent years at Trex Company learning the ins and outs of premium decking and railing systems before opening Utah’s specialized outdoor living superstore. Whether you’re spec’ing cable railing supplies for a custom build or tracking down discontinued components for a warranty repair, I’ve seen what works—and what doesn’t—in Utah’s extreme climate.
, swaged or swageless fittings, top rail (wood or aluminum), protective sleeves, cable cutters, tensioning wrench, and spacer bars for runs over 4 feet - cable railing supplies infographic")
Building a cable railing system might seem complex at first glance, but once you break it down into its core components, it becomes much clearer. Think of it like baking a cake – you need the right ingredients in the right amounts for a perfect outcome. We’ve outlined the essential cable railing supplies you’ll need to get started.

The Foundation: Posts and Top Rails
Every robust railing system begins with a solid foundation: the posts. These vertical supports anchor your entire structure and dictate the aesthetic and material compatibility of your cable railing supplies.
Post Types
- Wood Posts: A popular choice for their classic appeal and ease of integration with existing deck structures. When using wood posts, it’s crucial to select hardware specifically designed for this material, often involving lag screws and specialized protectors to prevent cable abrasion.
- Metal Posts: These can be aluminum or steel, offering a sleek, modern look and superior strength. Metal posts often come pre-drilled or with specialized mounting systems, making installation straightforward. Many systems, like those from Fortress Railing, offer robust options that are both durable and stylish.
- Composite Sleeves: For those who love the low maintenance of composite decking, composite post sleeves can be installed over structural wood posts. These require specific tensioners and hardware designed to work with the sleeve material, ensuring a clean finish and long-lasting performance.
Top Rail
The top rail serves both a functional and aesthetic purpose. Functionally, it provides a graspable surface for safety (and often a place to rest your drink!). Aesthetically, it caps off the railing system, tying the entire design together. Options include matching wood, composite, or aluminum, with many systems offering different profiles and finishes to complement your home’s style.
The Infill: Cable and Fittings
This is where the magic of “unobstructed views” truly comes to life. The cable and its accompanying fittings are the heart of your cable railing system.
Cable Types
The most common and recommended cable for railing systems is made from T316 stainless steel, a marine-grade alloy known for its superior corrosion resistance. This is especially important in Utah, where we experience significant temperature fluctuations and harsh elements.
- 1/8″ Cable: This is a standard diameter, offering a subtle, minimalist look. It’s strong enough for most residential applications when properly tensioned.
- 5/32″ Cable: A slightly thicker option that provides a bit more visual presence and can offer improved rigidity for longer runs.
Both typically come in a 7×7 strand construction, which provides a good balance of flexibility for installation and strength for tensioning.
Swaged Fittings vs. Swageless Fittings
Choosing between swaged and swageless fittings is one of the most critical decisions you’ll make when selecting your cable railing supplies, as it impacts both installation and aesthetics.
- Swaged Fittings: These require a specialized hydraulic crimper to permanently attach the cable to the fitting. This creates a very strong, clean, and often invisible connection, as the crimped end can be concealed within the post. While it demands specialized tools, many professionals prefer the permanent and streamlined finish of swaged fittings.
- Swageless Fittings: Also known as “mechanical” or “tool-free” fittings, these use a clever internal mechanism to grip the cable without the need for crimping. They are incredibly popular for DIY projects and smaller installations because they require only basic hand tools (or sometimes no tools at all!). Many swageless fittings are designed for tool-free installation, simplifying the process for DIYers.
Here’s a quick comparison:
| Feature | Swageless Fittings | Swaged Fittings |
|---|---|---|
| Installation | DIY-friendly, mechanical grip, often tool-free | Requires specialized hydraulic crimper for permanent bond |
| Tools Required | Basic hand tools (wrenches, cable cutters) or none | Hydraulic crimper, cable cutters |
| Appearance | Visible connection, can be larger | Clean, often concealed within posts, minimalist |
| Ease of Use | High, forgiving for DIYers | Moderate, requires precision and specialized tools |
Tensioning Systems and Terminals
Every cable needs to be properly tensioned to meet safety codes and prevent sagging. Tensioners are the fittings that allow you to tighten the cable, while terminals are the end points where the cable is anchored.
- Lag Screw Tensioners: Common for wood posts, these thread directly into the post and feature an adjustable barrel for tensioning.
- Through-Post Tensioners: Often used with metal or composite posts, these pass through the post and are tensioned on the outside or inside.
- Invisible Tensioners: Some manufacturers offer “invisible” designs where the tensioning mechanism is hidden within the post, creating an ultra-clean aesthetic.
The Toolkit: Essential Hardware and Accessories
Beyond the main components, you’ll need specific cable railing supplies for installation and a polished finish.
- Protective Sleeves: These small sleeves are inserted into post holes where cables pass through, preventing the cable from chafing against the post material (especially important for wood) and protecting the post itself.
- Cable Cutters: A high-quality pair of cable cutters is essential for making clean, precise cuts without fraying the stainless steel cable.
- Crimping Tool: If you opt for swaged fittings, a hydraulic crimping tool is a must-have for secure, permanent connections.
- Tensioning Wrench: Used to tighten the tensioners, ensuring each cable meets the required tension.
- Post Hole Covers: These decorative caps fit over drilled holes in intermediate or end posts, providing a finished look and protecting the interior of the post. Many high-quality systems highlight their post hole cover options for added protection and a refined finish.
- Spacer Bars: For longer cable runs, spacer bars are installed between posts to maintain consistent cable spacing and prevent deflection, ensuring the railing meets code requirements. Patented spacer bars from leading systems are designed to extend cable runs and improve stability.
- Spare Parts: We always recommend grabbing a spare parts bundle. Small parts have a knack for disappearing mid-project, and having extras on hand can prevent frustrating delays. Our hardware section has many of these crucial bits. Don’t forget screws for securing other parts of your deck!
Installation Insights: Level Runs vs. Stairs

Installing cable railing on a flat deck is straightforward, but stairs require extra attention. With the right cable railing supplies and a solid plan, you can tackle both scenarios with confidence.
Key Considerations for Level Railing
For level runs, your focus is on consistency and proper tension.
- Post Spacing: Proper post spacing is critical. Most systems require posts spaced 3 to 6 feet apart, depending on the post material and top rail strength. Metal posts typically handle longer spans than wood.
- Cable Tension: Getting the tension right is crucial to prevent sagging and avoid damaging posts. Each cable should be tensioned to the manufacturer’s specifications, usually 200-300 pounds. Some systems feature innovative tensioning controls that simplify this process.
- Intermediate Posts: For runs over 6 to 8 feet, you’ll need intermediate posts or support pickets to prevent cable deflection and meet building codes. Products like RailFX Railing are designed with simplified installation in mind.
- End Post Bracing: Corner and termination posts bear the full tension load. For wood posts, this often means adding internal blocking or using larger 6×6 posts. Metal post systems include reinforced mounting brackets to distribute the load. Our Ultimate guide to choosing the perfect deck railing system covers these structural details.
Finding the right cable railing supplies for stairs
Stair installations demand specialized hardware and extra attention to detail.
- Measure the Angle: Accurately measure your stair angle to order the right hardware and ensure cables run parallel to the slope. A digital angle finder is a great tool for this.
- Specialized Hardware: Standard fittings won’t work on a slope. You’ll need angled washers, pivoting fittings, or adjustable tensioners designed for your stair angle. Many manufacturers offer multi-angle fittings that adapt to various slopes.
- Handrail Requirements: Building codes require a graspable handrail on stairs. Your top rail must either serve as the handrail or you’ll need to add a separate one. Our Ultimate guide to choosing the perfect stair railing walks through code requirements.
Modern cable railing systems are user-friendly, even for stairs. Many manufacturers provide detailed installation guides and video tutorials. This helpful video on How to Install Cable Railing Hardware for Wood Posts demonstrates key techniques for a smooth installation.
Material, Maintenance, and Building Codes

Choosing the right materials and understanding local codes are essential for a successful project. Let’s review what makes quality cable railing supplies last and keep inspectors happy.
Why T316 Stainless Steel is the Industry Standard
T316 stainless steel is the best material for the job, especially in Utah’s demanding climate.
- Corrosion Resistance: T316 is a marine-grade alloy containing molybdenum, which dramatically boosts its resistance to corrosion from moisture and de-icing salts.
- Durability: This material won’t rust, pit, or lose its shine. A T316 cable railing can look nearly new for a decade with minimal care. Our article on the benefits of installing steel railings in your home explains why steel is a smart long-term choice.
- Low Maintenance: Unlike wood, T316 stainless steel just needs an occasional wipe-down with mild soap and water. No staining, painting, or sealing is required.
Building codes are legal requirements designed for safety. Failing to meet them can result in costly rework.
- Guardrail Height: Most residential codes in Utah require guardrails to be at least 36 inches high for decks over 30 inches above ground. Always verify with your local building department, as codes can vary by city.
- The 4-Inch Sphere Rule: This critical rule states that no opening in the railing can allow a 4-inch sphere to pass through. For cable railing, this typically means spacing cables no more than 3 inches apart.
- Post Strength: Posts must be strong enough to handle cable tension without bending. End posts, which take the most stress, require robust anchoring or larger dimensions.
- Handrail Requirements: Handrails, especially on stairs, must be continuous, graspable, and installed at the correct height.
Our team at Utah Deck Supply stays current on local regulations and can help you meet code requirements. The RDI Railing Catalog is also a great resource. Many maintenance principles in our guide on 10 essential tips for maintaining your Trex railing system also apply here.
Aesthetics, Cost, and Finding a Supplier
The visual impact and overall investment are major factors in choosing your cable railing supplies. Modern systems offer a surprising amount of customization to fit your style and budget.
Aesthetic Options
Cable railing is minimalist, but the details make the design.
- Finishes: Beyond classic brushed stainless steel, you can opt for black oxide or black anodized finishes for a bold, contemporary feel.
- Invisible Designs: Some systems hide tensioners and fittings inside the posts, making the cables appear to float in space—perfect for maximizing views.
- Post Styles: Slender metal posts create a modern vibe, while wood posts bring warmth. Composite sleeves offer a low-maintenance, contemporary look.
Essential cable railing supplies for wood posts
Wood posts are a popular and accessible option, but they require specific hardware for a durable, clean installation.
- Lag Screws: These are the go-to fasteners for tensioning fittings that thread directly into wood posts, providing a rock-solid anchor.
- Protector Sleeves: These crucial sleeves line the drilled holes where cables pass through, preventing the cable from abrading the wood over time.
- Surface-Mount Fittings: As an alternative, these fittings mount directly onto the wood post surface, which can simplify installation. Our Trex decking selection provides a great foundation for any railing project.
Budgeting for Your Project
The average cost of a cable railing system ranges from $50 to $150 per linear foot, depending on several factors:
- Linear Footage: More railing means a higher total cost.
- Post Material: Wood posts are typically the most budget-friendly, while metal and composite systems can cost more.
- Fitting Type: Swageless fittings may cost more per piece but don’t require expensive tools. Swaged fittings require a tool investment but can be more cost-effective for large projects.
- DIY vs. Professional Labor: DIY saves on labor costs, while professional installation guarantees a flawless, code-compliant finish.
- Brand: Different brands offer varying levels of quality, features, and price points.
Our team at Utah Deck Supply can provide a detailed quote to help you find the right balance of quality and value for your project.
Frequently Asked Questions about Cable Railing
Here are answers to the most common questions we hear about cable railing supplies.
What is the difference between swaged and swageless fittings?
Swaged fittings are permanently attached to the cable with a hydraulic crimping tool. This creates a very strong, clean, and often hidden connection favored by professionals for its minimalist look.
Swageless fittings use a mechanical grip and can be installed with basic hand tools. They are ideal for DIY projects because they are more forgiving and don’t require specialized equipment, though the hardware is typically more visible.
Can I install a cable railing system myself?
Yes, DIY installation is very achievable with modern systems. Success depends on careful planning, accurate measurements, and patience. If you are comfortable with basic tools and following instructions, you can get great results. For complex layouts or for guaranteed peace of mind, hiring a professional is always a smart option.
How do I maintain my cable railing system?
Maintenance for T316 stainless steel cable railing is minimal.
- Routine Cleaning: Periodically wipe down cables and fittings with a soft cloth and a mild soap and water solution to remove dirt and salt deposits.
- Annual Check: Once a year, check the cable tension and tighten any sagging lines with a tensioning wrench. This is especially important in Utah due to temperature fluctuations.
That’s it—no painting, staining, or sealing required. For more tips, see our guide on 10 essential tips for maintaining your Trex railing system.
Get the Best Supplies for Your Cable Railing Project
Choosing the right cable railing supplies is the key to a stunning, modern, and safe outdoor space. Understanding the components, from the grade of stainless steel to the correct fitting type, allows you to move forward with confidence.
High-quality materials are essential, but so is expert advice. At Utah Deck Supply, we’re not a big-box store; we are specialists. Our West Jordan showroom is stocked with top-tier railing systems and the hardware you need, and our team is here to guide you through every decision.
We know what works in Utah’s climate, from Provo’s winters to St. George’s heat. We help homeowners and contractors steer complex installations, meet local codes, and find the perfect products. Our inventory is well-stocked for immediate pickup, and our showroom lets you see and touch the materials before you buy.
Let us help you get your project right the first time. Stop by our West Jordan location, give us a call, or explore our full range of decking and railing products online to get started today.