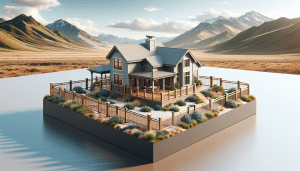
Picture this: warm Utah evening, a smoky little breeze from the grill, and a sturdy pavilion throwing honest-to-goodness Shade across your patio. That’s the scene many of our customers want—something simple, clean, and built to last through lake-effect storms and July heat. If you’ve been thinking about a pavilion for your backyard or for a client, here’s a quick, plain-English guide that still respects the technical stuff.
So…what exactly is a pavilion, and why does it matter?
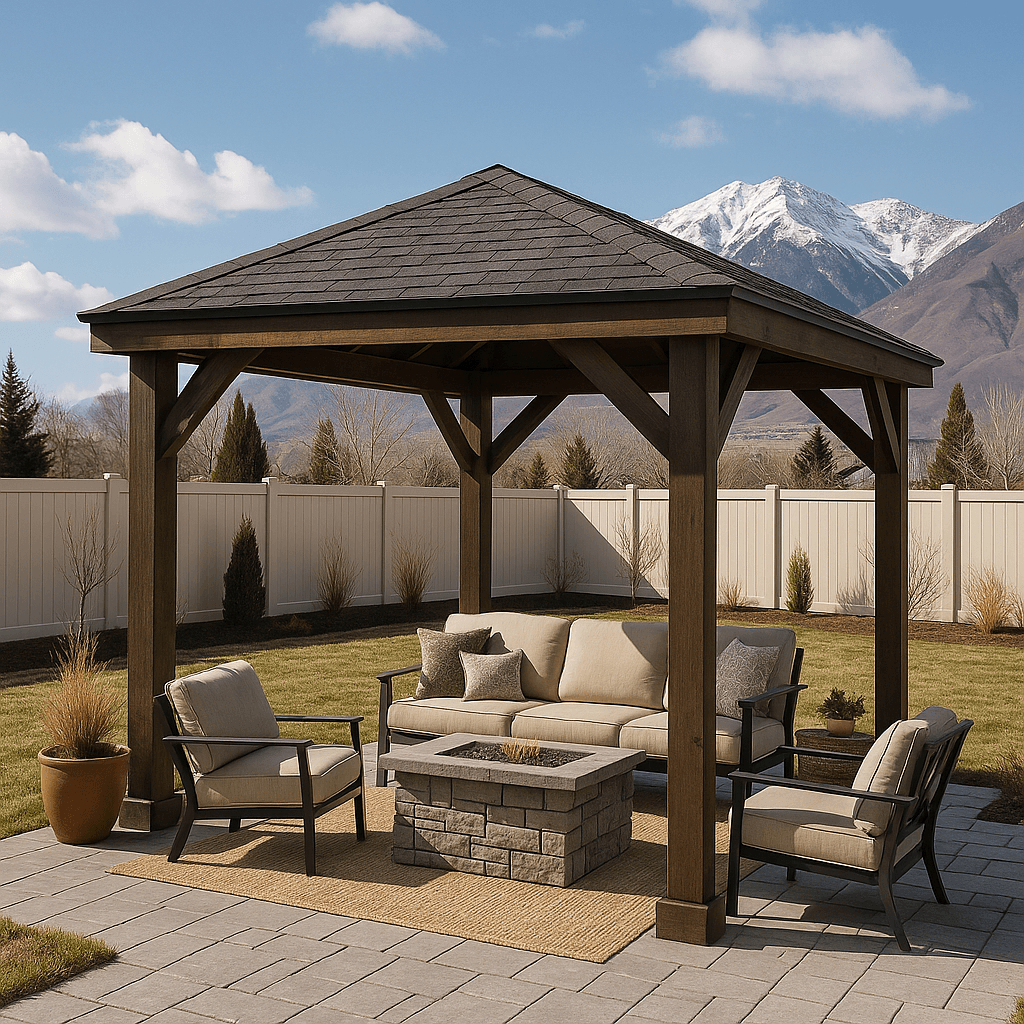
A pavilion is a freestanding, roofed structure. Not a pergola with spaced slats—this has a real roof that keeps out rain and snow. Think of it as a good hat for your yard. It gives shade, shelter, and a natural gathering spot. And it changes how you use your space. Summer dinners run longer. Spring projects don’t get rained out. Winter? You’ll still step out for fresh air because it’s covered and calm.
And yes, small difference, big deal. A roof means loads, bracing, and permits. Nothing scary—just a few extra steps done right.
Plan first, build fast later
Here’s the thing: good plans make easy builds. Start with these:
- Size and purpose: 10×12 for dining? 12×16 for a lounge and hot tub? Pick a size that fits your yard and your life.
- Site and slope: Keep it close to the house, but not awkward. Check drainage. A gentle slope is fine; a soggy low spot is not.
- Snow and wind: Along the Wasatch Front, roof snow loads and canyon gusts deserve respect. Call your city or county building department for the local numbers before you design.
- Utilities: Mark gas, water, and power lines with Blue Stakes of Utah (811). Quick call. Big peace of mind.
- Permits: In most Utah cities, a freestanding pavilion often needs a permit, especially over 200 square feet. Salt Lake County, Davis County, Utah County—rules vary. A short chat with the building counter can save you a headache.
You know what? Permitting sounds boring. But inspectors are usually helpful, and it keeps you safe and insured.
Materials that hold up along the Wasatch Front
Wood is classic. Cedar smells great, resists rot, and takes stain nicely. Redwood is local to the region and looks warm. Pressure-treated (ground-contact for posts) brings toughness at a good price. If you want modern lines, powder-coated Steel posts with wood beams look sharp and shrug off weather.
Hardware matters more than folks think. For treated Lumber, use hot-dip galvanized or stainless fasteners. We stock Simpson Strong-Tie ZMAX and Outdoor Accents, OZCO OWT brackets, and Structural screws like GRK RSS, FastenMaster TimberLOK, and Simpson SDWS for fast, clean assembly.
Roofing? Metal sheds snow well and looks sleek. Asphalt shingles match most homes and stay quiet during rain. Polycarbonate panels let in light while blocking UV—nice over gardens or smaller footprints. We’ll help you match roof type to pitch and budget.
Footings and posts—the unglamorous heroes
Utah frost depth sits around 30 inches in many cities. Set concrete footings below that to avoid heaving. For typical pavilions, 12–18 inch diameter footings with rebar cages are common, but check your loads. We carry Quikrete 5000 and Sakrete High-Strength mixes that cure strong in our climate.
Use a cardboard form (Sonotube), keep the top clean and level, and set adjustable post bases after the pour. Simpson ABU66Z or PBS66 are workhorses. Anchored with 1/2-inch wedge anchors, they keep your posts dry and secure.
Alternatives? Helical piers (Techno Metal Post) are fast and clean—great when you want minimal concrete or you’re in a tight backyard with tricky access. Oz-Post ground spikes can work for small structures in decent soil, but we prefer concrete or helicals for snow and wind areas.
Beams, rafters, and connections—clean loads, clean lines
Most backyard pavilions run 4 posts with 6x6s. Beams can be built from doubled 2x10s or 2x12s, or use solid glulam for longer spans and a polished look. Rafters are often 2×6 or 2×8 at 16 inches on center. That said, don’t guess—check span tables for your species and load, or ask us to connect you with an engineer if you’re going big.
Use hurricane ties for every rafter-to-beam connection. Add knee braces or concealed brackets for lateral stiffness—Utah winds love to test your work. Simpson Strong-Tie Outdoor Accents and OZCO OWT make those braces look intentional, not tacked on.
Roof pitch? 3:12 to 6:12 is common. Metal can go lower; shingles like a bit more slope. A ridge beam (supported) is stronger than a ridge board (not structural), and it keeps lines crisp when you want a vaulted look.
Roof choices that pay off in January
Ice and snow are the real critics. Lay ice-and-water shield along the eaves and any valleys. Underlayment everywhere else. For metal roofs, consider snow brakes if the roof dumps onto a walkway. For shingles, use proper starter strips and vents where needed.
Gutters help—especially on the north side where melt refreezes. Run downspouts to daylight or a drain rock bed so you don’t build a backyard skating rink.
Fast build sequence (for contractors and confident DIYers)
- Layout: Square the footprint with the 3-4-5 rule or a laser. Pull tight strings.
- Footings: Dig below frost. Form, rebar, pour, and set anchor bolts or plan for post-base anchors after cure.
- Posts: Cut tops to consistent height. Install post bases, plumb the posts, and lock them in.
- Beams: Set beams with structural screws or through-bolts. Check for level.
- Rafters: Mark layout, seat cuts clean, tie every connection.
- Roof deck: Sheathing, underlayment, flashing, then shingles or metal.
- Bracing: Add knee braces, check racking resistance, tighten everything.
- Finish: Trim cuts, stain or paint, then hardware caps for a tidy look.
Two skilled folks can assemble a mid-size pavilion in a weekend after the concrete cures. Three makes it smooth. Solo? It’s possible, but bring clamps and patience.
Little extras that change the feel
Lighting makes it magnetic at night. Use a fan-rated box in the center if you want airflow. Add a couple of GFCI outlets—string lights, speakers, a smoker. Radiant patio heaters keep winter hangouts going. Privacy screens on the windy side cut the bite without closing it off.
Finish the wood. A quality semi-transparent stain with UV blockers keeps cedar and redwood rich. For treated lumber, let it dry out a bit before staining. And wire work? Pull a permit and use an electrician if you’re not licensed. It’s your backyard—keep it safe.
Common Utah hiccups (and fast fixes)
Clay soils that swell? Go deeper on footings, and widen the base with a proper bell. Drainage issues? French drain or a slight swale keeps water moving. High water table in spring? Helical piers again—clean and reliable.
HOA approvals can feel slow. Bring a simple sketch with colors and roof type. It’s easier to say yes to a clear plan. And those canyon winds through Davis County? Add diagonal bracing and through-bolted connections. It’s not overkill—it’s Tuesday.
Tools that make it smoother
- 12-inch sliding miter saw for clean beam and rafter cuts
- Impact driver (Makita, DeWalt) and a corded hammer drill for anchors
- Rotary laser or builder’s level for quick heights
- Post level, long level, and string line—still undefeated
- Structural screws: GRK RSS, FastenMaster TimberLOK, Simpson SDWS
- SDS-plus bits and 1/2-inch wedge anchors for post bases
One more small thing: predrill near board ends. Split wood is a heartbreaker.
What we supply—and how we help
At Utah Deck Supply, we stock the lumber, brackets, fasteners, and roofing you actually want to use. Cedar and redwood in real sizes. Powder-coated brackets that look good out of the box. Color-matched screws so the roof doesn’t sparkle like a tackle box. We deliver across Salt Lake County, Davis County, and Utah County.
Need a takeoff? Bring us a sketch, and we’ll put together a materials list with sensible quantities. Bigger project? We can suggest engineer partners who know our snow and wind loads. You’ll leave with a plan, not a question mark.
Quick sizing notes—then double-check locally
Rules of thumb (not a promise, so verify with span tables and local loads):
- 10×12 pavilion: four 6×6 posts; beams of double 2x10s; 2×6 rafters at 16 inches on center; 1/2-inch sheathing.
- 12×16 pavilion: consider double 2×12 beams or glulam; 2×8 rafters; bracing on all sides for wind.
- Footings: below frost, 12–18 inches diameter with rebar; bigger if soil is soft or spans jump.
If it sounds conservative, that’s on purpose. A pavilion should feel solid when a storm rolls through.
Ready to build? We’re here for materials, advice, and delivery
Whether you’re a weekend builder or a contractor lining up a spring schedule, we’ll help you get it right the first time—fast quotes, straight boards, and hardware that doesn’t rust out on you. Call Utah Deck Supply at 385-993-5492, or Request a Free Quote. Let’s get that pavilion standing before the next big game or family barbecue.