Quick Reference: Essential Steps for Successful Deck Installation
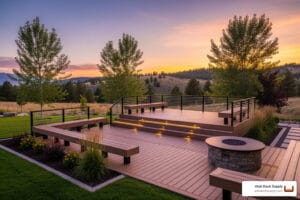
A deck installation guide is your roadmap to changing a stack of lumber and hardware into a stunning outdoor living space that boosts your home’s value and your quality of life. Whether you’re a seasoned contractor managing multiple crews, a solo craftsman tackling your first composite build, or a DIY homeowner ready to roll up your sleeves, understanding the full installation process—from footings to fascia—can mean the difference between a deck that lasts decades and one that becomes a maintenance nightmare. This guide walks you through every critical step, backed by real-world insights and manufacturer best practices.
Here’s what every deck installation guide should cover, in order:
- Plan and Prep – Obtain permits, check codes, mark utility lines, and gather tools and materials
- Build the Substructure – Install footings, ledger board, beams, joists (12″ or 16″ on-center), and blocking
- Install Decking – Choose face screwing or hidden fasteners, account for expansion gaps (1/8″ to 1/4″), and maintain proper board spacing
- Add Finishing Touches – Install fascia, picture frame borders, stairs, railings, and lighting
- Maintain Your Deck – Clean regularly, address UV weathering, and follow manufacturer warranty guidelines
Key Numbers to Remember:
- Minimum 4″ clearance under deck for ventilation
- 1/4″ per 10 ft. pitch for drainage
- 18″ open air under joists for hardwood decks
- 12″ or 16″ joist spacing (depending on material and load)

Why This Deck Installation Guide Matters for Utah Builders and Homeowners
Building a deck in Utah means accounting for our extreme temperature swings. A proper deck installation guide isn’t just about steps; it’s about understanding why each one matters. Correct joist spacing prevents sagging, proper expansion gaps stop composite boards from buckling, and following manufacturer guidelines protects your warranty. Honestly, small mistakes early on—like skipping flashing or using the wrong fasteners—can lead to rot, mold, and costly callbacks down the road.
About Your Guide
I’m James Bonham, co-founder of Utah Deck Supply. As a former Trex Company team member, I’ve spent years helping builders and homeowners master composite decking. This guide draws on that hands-on experience from hundreds of deck builds across the Wasatch Front. We’ll walk you through the process with real-world tips to help you build a deck that lasts.

Pre-Installation: Planning, Prep, and Safety
Before you cut your first board, a solid plan is your best friend. This phase sets the stage for a smooth, successful build.
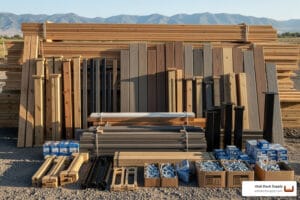
Gathering Your Tools and Materials
Having the right tools and materials on hand is crucial. For cutting dense composite or hardwoods, carbide-tipped blades are a must for clean cuts.
Essential Tools:
- Drill/Impact Driver
- Circular Saw & Miter Saw
- Jigsaw
- Post Hole Digger
- Measuring Tape, Framing Square, & Level (4 ft. minimum)
- Chalk Line
Your materials list will include structural lumber, fasteners (screws, clips), and hardware (joist hangers, post anchors). Find a complete list in our blog on Essential Deck Building Supplies.
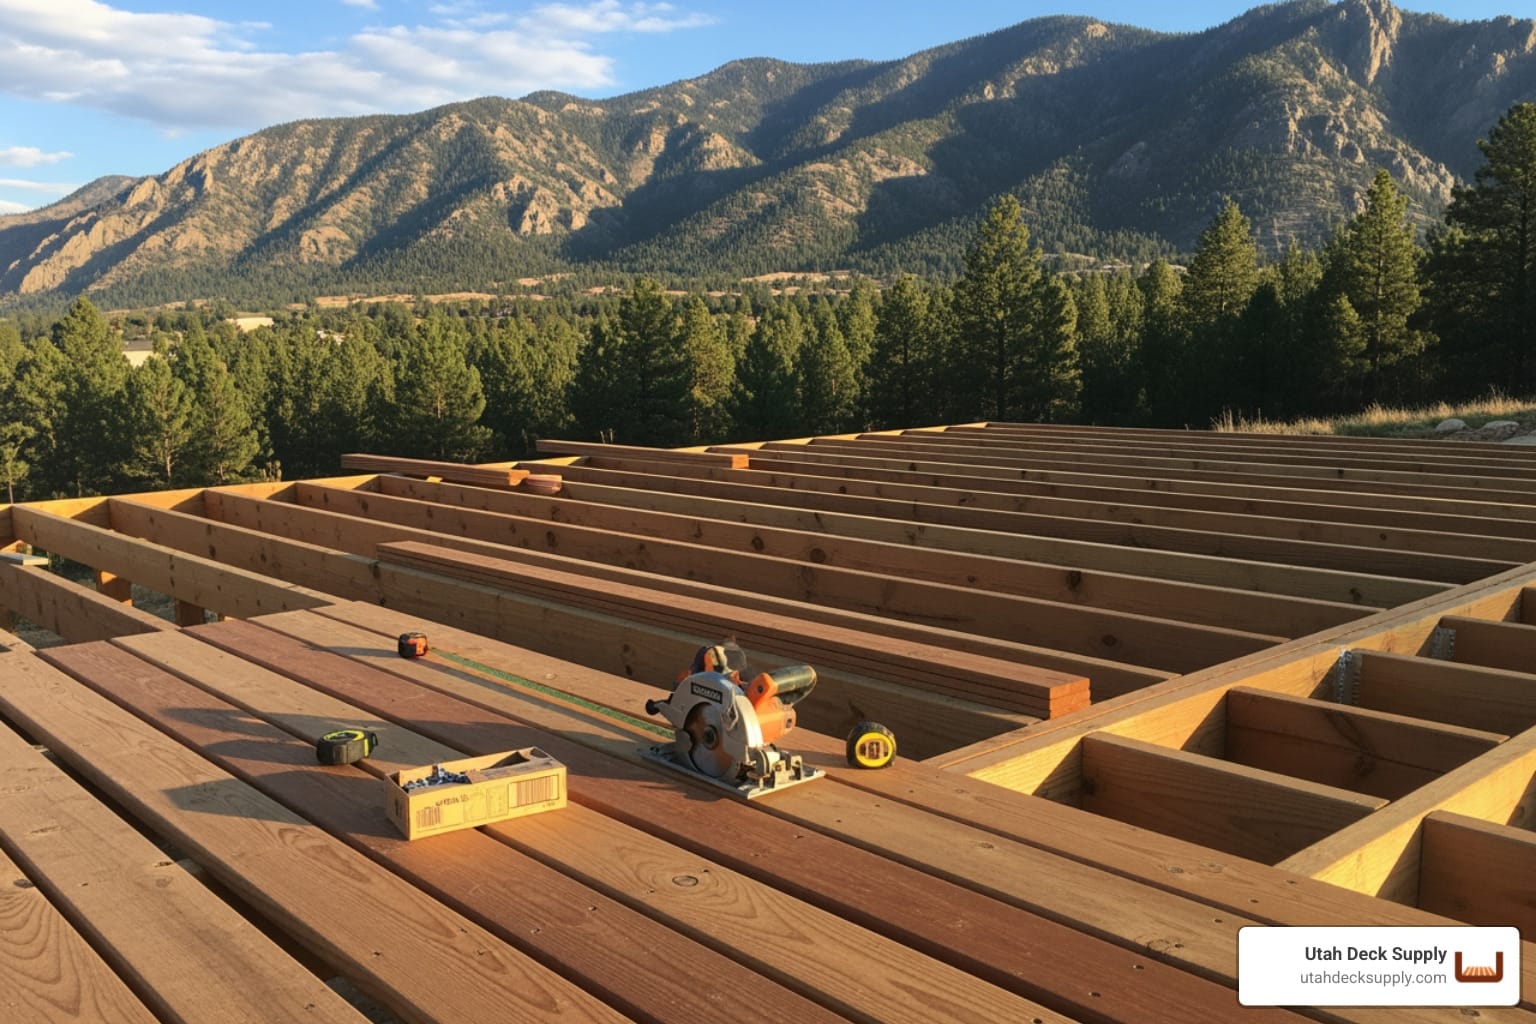
Preparing the Deck Frame: A Critical Step in Your Deck Installation Guide
The substructure is your deck’s backbone. Here are the critical steps:
- Footings and Posts: Dig and pour concrete footings according to local code. In Utah, proper depth is key. Allow concrete to cure for at least 24 hours.
- Ledger Board: This board attaches the deck to your house. It must be securely fastened and properly flashed to prevent water from causing rot. This is one of the most common failure points we see.
- Joist Spacing: Most decking requires joists spaced 12” or 16” on center. For stairs, 12″ on center is often required. Ensure joists are flat (crowned side up) to avoid a wavy surface. Learn more from the experts at TimberTech: More info on joist spacing from the experts.
- Blocking: Install blocking between joists to prevent them from twisting and create a more rigid surface.
- Pitch for Drainage: Slope the deck away from the house at a minimum of 1/4″ per 10 ft. to ensure water runs off.
- Ventilation: This is crucial. A minimum of 4 inches of continuous clearance under the decking is required. For hardwoods, 18 inches of open air is recommended.
- Expansion and Contraction: Decking materials move with temperature changes. You must leave gaps at the ends and sides of boards as specified by the manufacturer. Ignoring these can cause boards to buckle.
Before you dig, check with your local building department for permit requirements. You are responsible for obtaining all necessary permits. Learn more in our guide: Deck Building Permits and Regulations: Navigating the Red Tape.
Safety First: Key Precautions for Deck Installation
Deck building involves risks, so prioritize safety.
- Personal Protective Equipment (PPE): Always wear safety goggles, gloves, and hearing and respiratory protection, especially when cutting composite materials.
- Power Tool Safety: Follow manufacturer instructions, keep blades sharp, and ensure guards are in place.
- Lifting: Lift with your legs, not your back. Ask for help with heavy lumber.
- Site Cleanliness: Keep your work area clear of scraps and tools to prevent tripping hazards.
- Electrical Safety: If installing lighting, hire a qualified electrician if you’re not confident with wiring.
For a complete checklist, see our Deck Safety Checklist: Ensuring Your Deck is Secure.
The Ultimate Deck Installation Guide
Now that your frame is solid, it’s time to lay the deck boards and bring your vision to life.
Fastening Your Deck Boards: A Comprehensive Deck Installation Guide

How you fasten your boards impacts your deck’s look and lifespan.
| Fastening Method | Pros | Cons | Best For |
|---|---|---|---|
| Face Screwing | Simple, fast, budget-friendly | Visible fasteners, potential splits, “mushrooming” effect if not done right | Traditional lumber, solid composite boards where aesthetics are less critical |
| Hidden Fasteners | Clean look, no visible screws, allows for natural expansion/contraction, prevents splinters | Slightly more time-consuming, requires specific tools or board profiles, can be pricier | Grooved composite decking, premium hardwood, any deck where a clean, blemish-free surface is desired |
- Grooved vs. Solid Boards: Grooved boards are designed for hidden fastener systems (like TurboClip or CONCEALoc), which slide into the grooves for a clean surface. Solid boards are typically face-screwed. If face screwing composite, use specialized screws and pre-drill to prevent “mushrooming.”
- Hardwood vs. Composite: Installing hardwood like Ipe requires extra steps. It must acclimate on-site for ~7 days, requires stainless steel fasteners, pre-drilling for all screws, and sealing fresh cuts with an end-grain sealant. Hardwood also needs more ventilation—at least 18″ of open air under the joists.
Need help choosing? Our guide on Composite vs. Wood Decks: Which is Right for You? can help.
Finishing Touches: Stairs, Railings, and Fascia
The final details lift your deck from functional to finished.
- Picture Framing: Installing a border of boards around the deck’s perimeter gives a clean, high-end look.
- Fascia Boards: These cover the rim joists. When installing composite fascia, pre-drill oversized holes to allow for expansion and attach it to the frame with screws spaced about 12 inches apart.
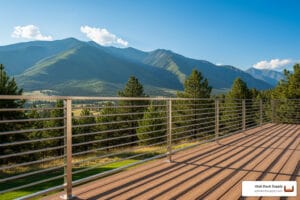
- Stairs & Railings: Ensure stair stringers are secure and use 12-inch joist spacing for treads. For railings, securely fasten posts to the deck frame, then install rails and infill (balusters, cables, or glass) according to the manufacturer’s guide. We offer complete systems from Trex, TimberTech, Fortress, and more.
For detailed instructions, see our guides on A Step-by-Step Guide to Installing Your Trex Railing and Deck Railing Styles for Added Beauty and Safety.
Beyond the Build: Maintenance, Accessories, and Warranty
A little planning for the future ensures your deck stays beautiful.
- Maintenance: Composite decking is low-maintenance; clean it with soap and water. Hardwood like Ipe can be oiled every couple of years to maintain its color or left to weather to a silvery gray.
- Deck Lighting: Low-voltage lighting adds ambiance and safety. For inspiration, see our Deck Lighting Ideas for Ambiance and Safety.
- Warranty: This is critical. Deviating from the manufacturer’s installation guidelines can void your warranty. Always follow the official guide for your specific product.
- Finding Guides: We can direct you to the official installation guides for all the brands we carry, including Armadillo, Trex, TimberTech, and NewTechWood. You can also find them on the manufacturers’ websites, like this Official NewTechWood Installation Guide.
Your Deck is Built—Time to Enjoy It!
Congratulations! You’ve steerd the complexities of framing, fastening, and finishing. Now it’s time to relax and enjoy your new outdoor living space.
Furnish your deck for comfort and style, and remember that regular cleaning will keep it looking its best for years to come. For all your project needs—from the highest quality materials to expert advice custom for Utah’s climate—the team at Utah Deck Supply is ready to help. Get inspired by visiting our showroom in West Jordan to see products hands-on and get the materials you need today. We’re here to support builders across Utah, from Salt Lake City to St. George.