Why a Deck Planning Guide Matters
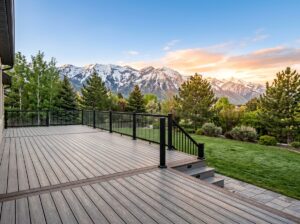
Planning a new outdoor space is an exciting journey that transforms your backyard into a functional retreat. Using a comprehensive deck planning guide ensures you don’t miss critical details like local building codes, material durability, or structural integrity. Honestly, taking the time to map out your project now saves you from expensive headaches down the road.
A deck planning guide walks you through every decision—from choosing materials and sizing your deck to understanding permits and safety codes. It’s the roadmap that keeps your project on budget, on schedule, and up to code. Let me explain: without a solid plan, you risk costly mistakes, failed inspections, and structural problems that show up years later.
Here’s the thing: most deck failures and cost overruns trace back to poor planning. Whether you’re a seasoned contractor managing multiple crews or a motivated DIYer tackling your first build, a comprehensive deck planning guide ensures you don’t skip critical steps like calling 811 before digging, calculating proper joist spans for Utah’s snow loads, or selecting hardware that won’t corrode in our extreme climate swings.
Quick Overview: Essential Steps in Deck Planning
- Assess Your Space – Measure your yard, identify utilities, and evaluate terrain and sun exposure
- Choose Your Approach – Decide between DIY or hiring a professional based on complexity and skill level
- Select Materials – Compare wood, composite, and PVC for durability, maintenance, and climate performance
- Design Layout – Determine deck size, shape, stairs, and railings that fit your home and lifestyle
- Secure Permits – Submit plans to your local building department and ensure IRC compliance
- Plan Substructure – Calculate footing depths below frost line, joist spacing, and beam spans
- Budget Accurately – Factor in materials, labor, hardware, pre-work, and finishing touches
Honestly, the research shows that deck plans based on the International Residential Code streamline permit approvals and prevent rework. You know what? Even complex features like hot tub platforms or wraparound layouts become manageable when you start with a clear, code-compliant blueprint.
As James Bonham, co-founder of Utah Deck Supply and former Trex Company specialist, I’ve guided hundreds of builders and homeowners through the deck planning process using proven strategies that account for Utah’s unique climate and code requirements. This deck planning guide distills that hands-on experience into a step-by-step framework you can trust.

Deck planning guide terms to remember:
Essential Steps in Your Deck Planning Guide
Every successful project starts with a thorough site assessment. You need to know exactly what you’re working with before you buy a single board. Start by measuring the dimensions of your house and the available yard space. Look for obstacles like basement windows, dryer vents, or outdoor faucets that might interfere with your ledger board (the piece that connects the deck to your house).
DIY vs. Professional Installation
One of the biggest questions in any deck planning guide is whether to do it yourself or hire a pro. Honestly, it comes down to two things: your skill level and your schedule.
- DIY Deck Building: This can save you significantly on labor costs—often 30% to 50% of the total project price. It’s a great option for simple, low-to-the-ground rectangular decks. However, it requires a significant time commitment and access to specialized tools like an auger or a miter saw.
- Hiring a Professional: A licensed contractor brings expertise in local Utah building codes and structural engineering. They handle the permitting process and ensure the deck is safe for heavy loads (like that hot tub you’ve been eyeing). For complex, multi-level designs or decks high off the ground, a pro is often the safer bet.
Check out our detailed breakdown on DIY vs Professional Deck Installation: Which is Right for You? to help make your choice.
Cost Factors and Budgeting
Budgeting is where many homeowners get a reality check. When planning your dream deck: budgeting and design tips are applied correctly, you’ll account for:
- Materials: Decking boards, railing, and the pressure-treated lumber for the frame.
- Labor: If you’re hiring out, this is a major chunk.
- Hardware: Joist hangers, structural screws, and fasteners.
- Pre-work: Does your yard need leveling? Do you need to tear down an old, rotting deck first?

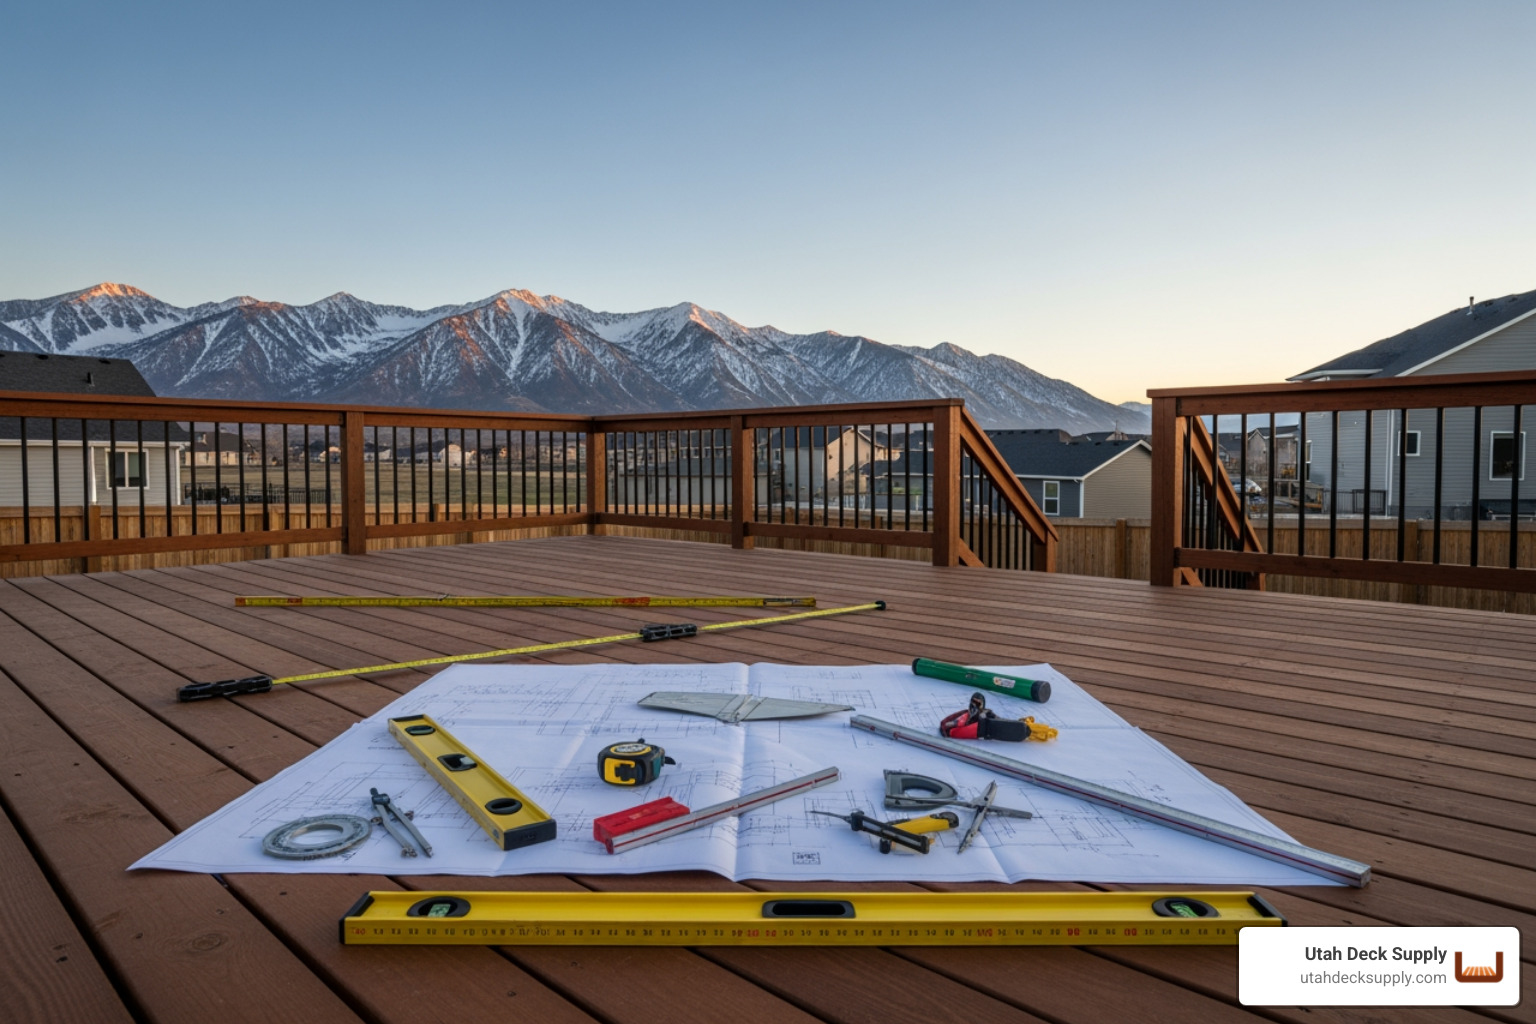
Choosing the Right Layout and Deck Planning Guide Tools
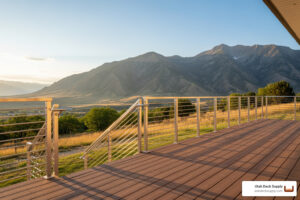
Your deck’s layout should be a marriage of functionality and your home’s architecture. Are you planning on hosting 20-person summer barbecues in Draper, or do you want a quiet, intimate nook for morning coffee in Logan?
Design Considerations:
- Functionality: Zone your deck. Create a dedicated space for dining, another for lounging, and perhaps a corner for a grill or fire pit.
- Yard Configuration: If you have a sloped yard in Salt Lake City, a multi-level deck might be the best way to maximize space.
- Visualizing Your Space: You don’t have to guess. Use 3D designers or AR (Augmented Reality) visualizers to see how different colors and shapes look against your actual house.
Crucial Step: Before you finalize any design that involves digging, you must call 811 before you dig. This free service identifies underground utility lines (gas, water, electric) so you don’t accidentally knock out the neighborhood’s power while digging footings. For more inspiration, explore our Deck Design Ideas: Creating an Outdoor Oasis.
Selecting Materials: Wood vs. Composite Deck Planning Guide
Choosing your material is perhaps the most impactful decision for long-term satisfaction. In Utah’s climate—where we see scorching 100-degree summers and heavy snow in the winter—durability is everything.
| Feature | Pressure-Treated Wood | Composite (Trex, TimberTech) | Advanced PVC |
|---|---|---|---|
| Upfront Cost | Lowest | Moderate to High | Highest |
| Maintenance | High (Stain/Seal every 1-2 years) | Low (Soap and water) | Lowest (Fade/Stain resistant) |
| Lifespan | 10–15 years | 25–50 years | 50+ years |
| Heat Retention | Moderate | Varies by brand | Best (Stays cooler) |
| Splinters | Yes | No | No |
- Wood: Cedar and pressure-treated lumber are classic. They look great initially but require constant upkeep to prevent rot and warping.
- Composite: Brands like Trex and TimberTech blend recycled wood fibers with plastic. They won’t rot, warp, or splinter.
- PVC: This is the “gold standard” for performance. It’s entirely synthetic, making it highly resistant to moisture and the best at staying cool under the Utah sun.
For a deeper dive, read our choosing the perfect deck material: a comprehensive guide or the ultimate guide to choosing composite decking.
Let’s talk about the “boring” stuff that actually keeps you safe: permits and codes. Most cities in Utah—including West Valley City, Sandy, and Lehi—require a building permit for any deck that is attached to the house or over a certain height (usually 30 inches).
Why bother with a permit?
- Safety: An inspector ensures your deck won’t collapse under a heavy snow load.
- Resale: Unpermitted work can hold up the sale of your home later.
- Insurance: If an unpermitted deck fails, your insurance might not cover the damage.
You’ll need to submit a site plan showing property lines and setbacks (how far the deck must be from your neighbor’s fence). Check with your local building codes department for specific requirements. Our guide on Deck Building Permits and Regulations: Navigating the Red Tape can help you steer the paperwork.
Safety Features: Railings, Stairs, and Lighting
Safety isn’t just about the structure; it’s about how you use the space.
- Railings: Per the International Residential Code (IRC), any deck higher than 30 inches off the ground needs a railing at least 36 inches high.
- Balusters: To keep kids and pets safe, the “4-inch rule” is standard—a 4-inch sphere should not be able to pass through any part of the railing.
- Lighting: Don’t forget LED stair lighting. It looks amazing at night and prevents trips and falls.
- Stairs: Ensure your risers and treads meet code (usually a 7-inch maximum rise and 11-inch minimum tread).
Check your project against our Deck Safety Checklist: Ensuring Your Deck is Secure and learn about choosing the perfect deck railing system.
Substructure Best Practices: Footings, Joists, and Hardware
The substructure is the “skeleton” of your deck. If the skeleton is weak, the whole body fails.
- Footings: In Utah, you must dig footings below the frost line (often 30–36 inches deep depending on your specific city like Park City vs. St. George) to prevent “frost heave” from lifting your deck out of the ground.
- Joist Spacing: For most composite decking, joists should be spaced 16 inches on center (12 inches if you’re laying boards diagonally).
- Ledger Board: This must be flashed and bolted correctly to your house to prevent water from rotting your home’s rim joist.
- Hardware: Use G185 galvanized or stainless steel connectors. Avoid standard “indoor” screws; they will snap or rust.
- Joist Tape: Honestly, this is a pro secret. Applying butyl tape to the tops of your joists prevents moisture from sitting between the board and the wood, potentially doubling the life of your frame.
Get the full scoop in our Deck Hardware Complete Guide and see our list of Essential Deck Building Supplies.
Conclusion: Bringing Your Vision to Life
At Utah Deck Supply, we’ve seen it all—from backyard DIY triumphs to “what were they thinking?” disasters. Based in West Jordan, we serve the entire Wasatch Front and beyond, from Logan down to St. George. We aren’t a big-box store; we are specialists. Whether you need Trex, TimberTech, or traditional lumber, we keep a deep inventory so you can pick up your materials and start building today.
Your Deck Project Milestones:
- Finalize your design and material list.
- Submit permit applications to your city (Orem, Sandy, etc.).
- Order materials from a specialist who understands Utah codes.
- Dig and pour footings (below the frost line!).
- Frame the substructure and install the ledger.
- Lay your decking and install railings.
- Add finishing touches like lighting and fascia.
- Pass your final inspection and fire up the grill!
Explore our full range of professional deck supplies to see the latest in railing and decking technology.
You know what? Building a deck is a major investment, but with the right preparation, it’s one that pays off for decades. Let me explain: when you prioritize high-quality materials and follow a strict safety code, you aren’t just building a platform; you’re building peace of mind. If you’re ready to get started or need expert advice on the best materials for the Utah climate, give us a call at 385-993-5492 or Request a Free Quote today.