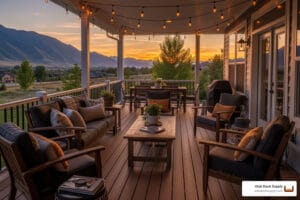
Looking to add shade, style, and a defined outdoor room without a long build? A 10×12 pergola kit hits the sweet spot for most backyards, balancing coverage, cost, and simplicity. Here’s how to choose, size, and install the right kit so you can enjoy a comfortable retreat in a single weekend.
Why a 10×12 Pergola Kit is the Perfect Backyard Upgrade
Pergola kits 10×12 offer the perfect balance of size, style, and simplicity for changing your backyard into a shaded retreat. Whether you’re a contractor looking for a reliable upsell option or a homeowner ready to add a stunning focal point to your outdoor space, a 10×12 pergola delivers a defined outdoor room without overwhelming your yard. The beauty of a kit is that you skip the complex measuring, cutting, and guessworkeverything arrives pre-cut, pre-drilled, and ready to assemble in a weekend.
Quick Answer: Best 10×12 Pergola Kits at a Glance
- Budget-Friendly Hardware Kits: Starting at $249 for attached models, $379 for freestanding (brackets and hardware only, lumber purchased locally)
- Mid-Range Wood Kits: $1,900 – $2,400 for complete Western Red Cedar or pressure-treated pine kits with all components included
- Premium Heavy-Duty Kits: $5,000 – $7,000+ for Big Kahuna or Serenity models rated for 175 MPH winds with 6×6 posts and double beams
Key Dimensions to Know:
- Roof opening: 10′ x 12′ (inside measurement)
- Overall footprint with 4×4 posts: 10′ 7.3″ x 12′ 7.3″
- Overall footprint with 6×6 posts: 10′ 11.3″ x 12′ 11.3″
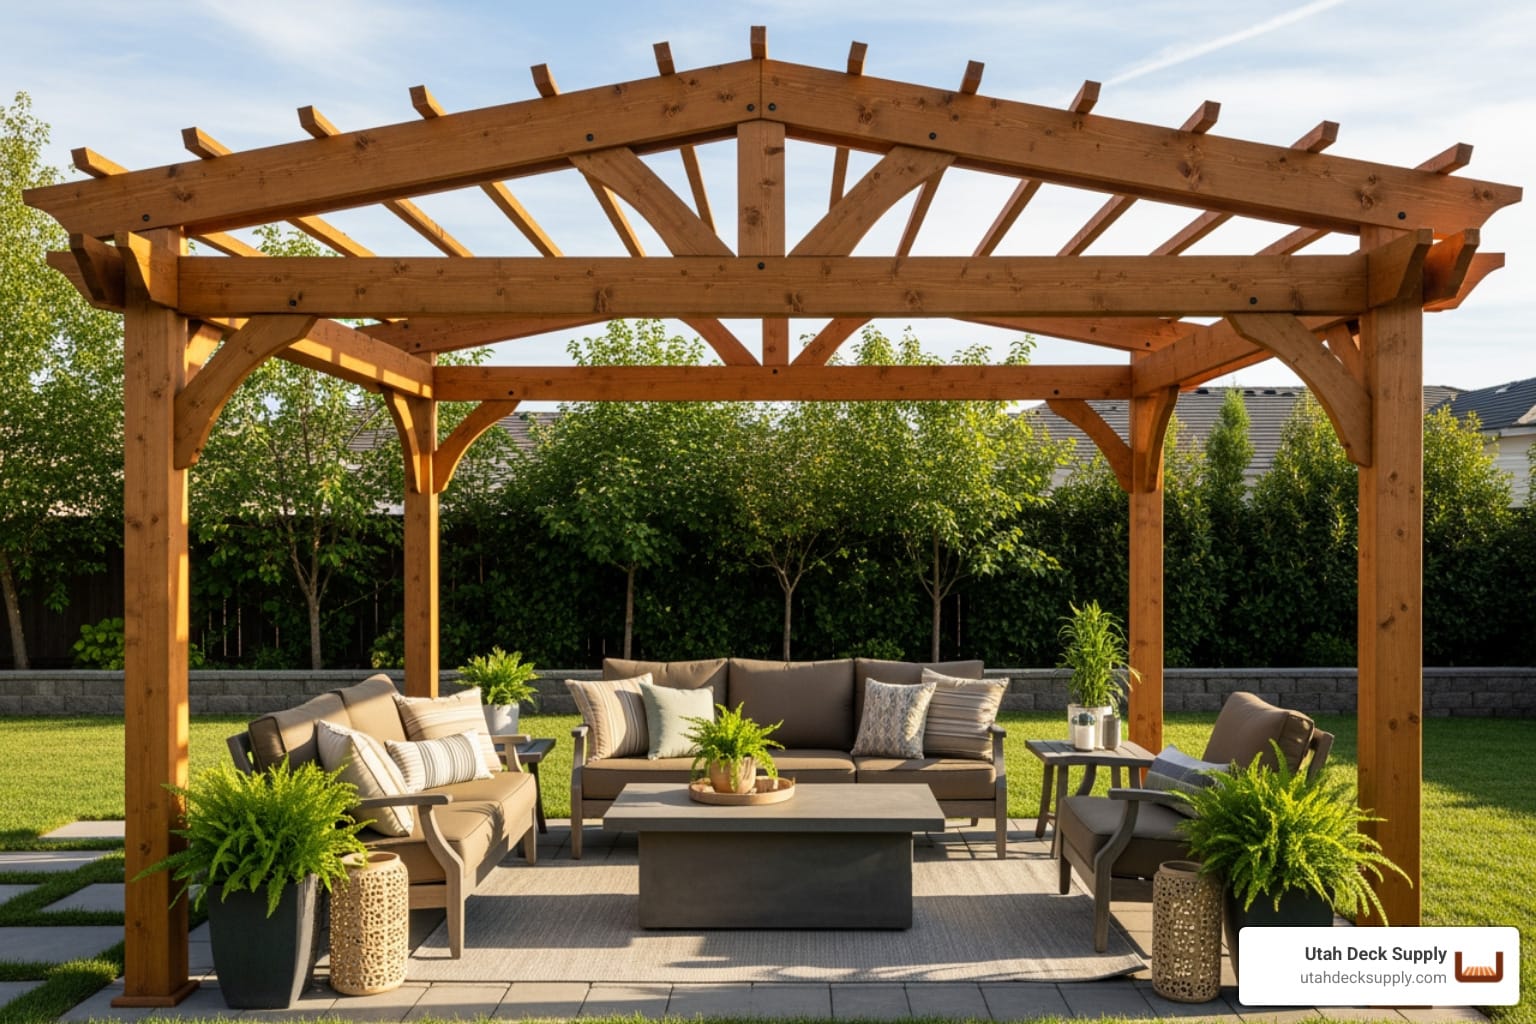
A 10×12 pergola kit is more than just a shade structureit’s a smart investment that creates a defined outdoor room for dining, lounging, or entertaining. This size comfortably fits a full patio set, a seating area with a fire pit, or even a hot tub, all while maintaining a balanced footprint that doesn’t dominate smaller yards. Unlike building from scratch, a kit eliminates the headaches of design calculations, complex joinery, and sourcing dozens of individual components.
Why kits beat DIY from scratch:
- Time savings: Most kits assemble in 2-3 hours with a helper versus days of measuring, cutting, and trial-and-error
- No specialty tools required: Basic drill, level, and wrenchno table saw or miter saw needed
- All parts included: Pre-cut, pre-drilled lumber or brackets mean no trips back to the lumberyard
- Engineered for stability: Kits are designed with proper spacing, spans, and structural integrity built in
The real magic of a 10×12 pergola is its versatility. It’s large enough to make a statement and provide meaningful shade, yet compact enough to fit most backyards without requiring extensive site prep or costly foundation work. Whether you’re adding one to a deck, patio, or grassy area, this size hits the sweet spot for both function and aesthetics.
I’m James Bonham, co-founder of Utah Deck Supply, and after years at Trex Company and now running our specialized outdoor living superstore, I’ve helped hundreds of contractors and homeowners steer pergola kits 10×12 and other shade solutions. From tracking down the right brackets for hardware-only builds to matching discontinued cedar stains for warranty jobs, I’ve seen what worksand what doesn’tin Utah’s brutal freeze-thaw cycles and high UV conditions.
, double beams, 6x6 or 4x4 posts, base brackets, hardware pack, and optional shade canopy; includes callouts for \"inside roof opening: 10'x12'\" and \"overall footprint varies by post size\"; bottom section shows price tiers from budget hardware kits ($250-$700) to mid-range complete wood kits ($1,900-$2,400) to premium engineered kits ($5,000-$7,000+) - pergola kits 10x12 infographic")
What makes the 10×12 size ideal? It’s the Goldilocks zone for pergolasnot too big, not too small. You get enough coverage for a 6-8 person dining table, a full seating set, or a cozy lounge area, but you’re not building a structure that requires engineering stamps or massive concrete footings. For contractors, it’s a high-margin upsell that installs fast and impresses clients. For DIYers, it’s a weekend project that delivers professional results.
In this guide, we’ll break down everything you need to know: how dimensions actually work (spoiler: that “10×12” refers to the roof opening, not the overall footprint), the key differences between freestanding and attached models, what’s included in kits at different price points, and how to choose the right material and style for your specific needs. Let’s dive in.
Decoding the Dimensions: Understanding Your 10×12 Pergola Kit
When you see “10×12” on a pergola kit, it’s important to know this refers to the inside roof opening—the clear space between the beams. The overall footprint, which includes the posts and beam thickness, will be larger. This detail is crucial when planning for a specific patio or deck space, as the actual ground space your pergola occupies can be nearly a foot wider on each side.
 and the larger overall exterior footprint of a pergola. - pergola kits 10x12")
Think of it this way: the 10×12 measurement defines your usable shaded area, but the posts sit outside that space. Always account for these extra inches when measuring your installation area to avoid issues with property lines or existing structures.
How Post Size Affects Overall Dimensions
The posts you choose for your pergola kits 10×12 directly impact its final footprint and appearance.
With 4×4 posts, a 10×12 pergola has an overall footprint of 10′ 7.3″ x 12′ 7.3″. This size works well for most residential applications, offering a lighter, more open aesthetic.
With 6×6 posts, the footprint grows to 10′ 11.3″ x 12′ 11.3″. These beefier posts provide improved structural stability and a more substantial, architectural presence, which is a great benefit during Utah’s occasional windstorms.
The choice between 4×4 and 6×6 posts comes down to your design preference and site conditions, as both provide solid performance when properly installed.
Why Width and Depth Matter
The orientation of your pergola kits 10×12 affects its function, particularly for shade. How you position the 10-foot and 12-foot sides determines how well it blocks the sun.
For attached pergolas, the width typically runs parallel to the house. A 10×12 pergola is often mounted with the 10-foot side against the house, projecting 12 feet into the yard. This deeper projection provides better shade during peak afternoon sun and creates a more defined outdoor room.
With freestanding pergolas, orientation is all about tracking the sun. To block harsh western sun in the late afternoon, position the shorter 10-foot dimension to face the sunset for more effective shade. Thoughtful planning ensures your pergola not only looks great but functions perfectly, creating one of those truly Stunning Decks with Pergolas.
A Guide to the Different Types of Pergola Kits 10×12

Choosing a pergola kit 10×12 comes down to three main decisions: structural style, roof type, and material. These choices determine your pergola’s appearance, performance in Utah’s climate, and maintenance requirements. Understanding these categories simplifies the selection process, helping you find the perfect fit for your backyard. For a deeper dive, our Transform Your Garden The Ultimate Guide to Pergola Kits covers all the options.
Structural Styles: Freestanding vs. Attached
Your first decision is whether the pergola will stand alone or connect to your house.
Freestanding pergolas offer total placement flexibility. Supported by four or more posts, they can be placed anywhere in your yard—over a patio, next to a pool, or in a garden—to create a defined outdoor room. This style is perfect for creating a destination retreat away from the house. Explore the possibilities in our Ultimate Guide to Freestanding Pergola Kits Transform Your Backyard.
Attached pergolas create a seamless extension of your home, mounting directly to an exterior wall with only two outer posts. This design is ideal for covering a deck or patio adjacent to the house, creating a natural flow from indoors to outdoors. Installation requires proper flashing and secure mounting to your home’s structure. See great examples in our list of Top Attached Pergola Kits for 2023.
Roof and Shade Options for Your 10×12 Pergola Kit
The roof style determines how much shade your pergola provides.
- Traditional Slatted Roof: Creates a classic dappled shade effect but offers minimal sun blockage. It’s ideal if you want some light filtering through or plan to grow climbing plants.
- Shade Canopy: A fabric cover that can block up to 95% of UV rays, creating a true escape from the summer heat. See options in our guide to the 10 Best Pergola Kits with Canopy for Your Outdoor Oasis.
- Retractable Canopy: Offers the best of both worlds, allowing you to open it for sun or close it for shade and light rain protection. Learn more in our guide to Retractable Pergola Kits.
- Louvered Roof: High-end kits may feature adjustable slats that tilt to control sun, ventilation, and rain, offering the ultimate climate control.
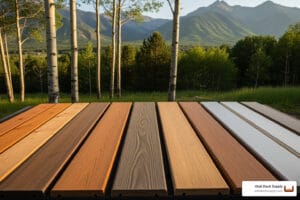
Choosing Your Material: Wood, Vinyl, and Metal
The material you choose affects aesthetics, durability, and maintenance.
Wood pergolas (pressure-treated pine, cedar, Douglas fir) offer a warm, natural look that can be stained or painted. Wood requires regular staining or sealing every few years to protect it from Utah’s UV rays and freeze-thaw cycles. For many, the authentic beauty is worth the upkeep. Explore options in our guide to Top Wooden Pergola Kits.
Vinyl pergolas are the low-maintenance champion, requiring only occasional washing. They won’t fade, crack, or rot, making them a great “set it and forget it” option. Customization is limited to the manufacturer’s colors and styles. Learn more about the advantages of Top Vinyl Pergola Kits for Your Backyard.
Metal pergolas (aluminum or fiberglass) provide a sleek, modern look with virtually zero maintenance. Aluminum is lightweight and rust-proof, while fiberglass is incredibly strong, lightweight, and heat-resistant. Both are ideal for contemporary designs and extreme weather. Check out our guide to Top Metal Pergola Kits for 2023.
Budgeting for Your Project: Costs and Kit Contents
Prices for a pergola kit 10×12 vary widely, from a few hundred to several thousand dollars. The cost is driven by material choice, brand reputation, and included features. A hardware-only kit will cost much less than an all-inclusive package with pre-cut premium lumber.
Here’s a breakdown of what to expect at different price points:
- Hardware-Only Kits ($249 – $379+): These include heavy-duty steel brackets and fasteners. You purchase the lumber separately, giving you control over wood type and quality while avoiding high shipping costs.
- Mid-Range All-Inclusive Kits ($1,900 – $2,400): These provide a complete package with pre-cut, pre-drilled lumber (pine or cedar), hardware, and instructions. They are perfect for a straightforward weekend project.
- Premium Heavy-Duty Kits ($5,000 – $7,000+): High-end options feature larger 6×6 posts, double beams, and high wind ratings (up to 175 MPH). They offer extensive customization, including material upgrades and electrical packages.
No matter your budget, there’s a kit to fit your needs. For affordable options, see our guide to 9 Cost-Effective Pergola Kits for Your Outdoor Oasis.
What’s Included in a Standard 10×12 Pergola Kit?
A typical pergola kit 10×12 is designed for easy assembly. Most kits include:
- Pre-cut and Pre-drilled Components: All beams, rafters, and posts are cut to size with holes drilled, eliminating complex work on-site.
- Hardware Package: Every screw, bolt, and washer needed for assembly, typically made of stainless steel or galvanized to resist rust.
- Brackets and Connectors: Engineered pieces to join structural elements securely and ensure stability.
- Assembly Instructions: Clear, detailed guides, often with diagrams or video tutorials.
Some kits also include decorative elements like post skirts or ornamental rafter cuts.
What Might You Need to Buy Separately?
Even comprehensive kits require a few separate purchases to complete the installation.
- Lumber: For hardware-only kits, you’ll need to buy all wood locally. This allows you to choose your preferred species and grade.
- Anchoring Hardware: Fasteners for securing the pergola to a deck, concrete patio, or footings are usually sold separately due to varying installation surfaces.
- Foundation Materials: If installing on soil, you’ll need concrete mix and gravel for post footings.
- Wood Stain or Sealant: Essential for protecting wood pergolas from Utah’s harsh sun and moisture. A quality stain blocks UV rays and prevents rot.
- Basic Tools: A drill, level, measuring tape, socket wrench, and ladder are typically required.
Planning for these items ensures a smooth building process. For more guidance, see 10 Things You Need to Know Before Buying Decking Planks.
From Box to Backyard: Installation and Customization
Assembling your pergola kit 10×12 is a rewarding weekend project. Proper preparation is the key to a smooth installation process that transforms your outdoor space.

Preparing for Installation
A little prep work saves hours of frustration. Follow these steps before your kit arrives:
- Select and Level Your Site: Choose a suitable spot and ensure the ground is level. A slight slope can compromise the structure’s stability.
- Prepare the Foundation: An existing concrete patio is ideal. For soil, you’ll need to dig and pour concrete footers for each post, which is crucial for stability in Utah’s freeze-thaw climate. For decks, ensure the structure can handle the weight and add blocking for secure fastening.
- Check for Utilities: Before digging, call 811 to locate any underground utility lines.
- Gather Your Tools: Most kits require a cordless drill, a 4-foot level, measuring tape, a socket wrench, and a ladder. A post-hole digger is needed for footers.
Reviewing a sample Instruction Manual can help you know what to expect. For more tips, see our Pergola Installation A Beginners Guide and 10 Essential Tips for Assembling Your Pergola Kit.
Personalizing Your Pergola
Once your pergola kit 10×12 is built, you can add personal touches to make it your own.
- Stain and Paint: For wood pergolas, a quality stain protects against Utah’s weather and adds color. Choose a finish that complements your home’s exterior.
- Privacy Screens: Add lattice, slatted screens, or fabric panels to create a more secluded retreat. Many kits include brackets that simplify adding privacy walls.
- Lighting: String lights create instant ambiance, while solar lanterns offer a warm glow without wiring. Premium kits may offer integrated electrical packages.
- Outdoor Curtains: Add elegance, adjustable shade, and privacy. They also provide a barrier against insects. Our guide on Choosing the Right Pergola Kit with Curtains can help you select the best option.
- Climbing Plants: Wisteria, grapevines, or climbing roses can create a living canopy that adds natural beauty and shade over time.
These custom touches transform your pergola from a simple structure into a true outdoor room. For more ideas, check out Custom Pergola Kits Elevate Your Outdoor Living Space.
Frequently Asked Questions about 10×12 Pergola Kits
Here are answers to the most common questions we receive about pergola kits 10×12 from customers across Utah.
Do I need a permit for a 10×12 pergola?
It depends on your local municipality. Permit requirements for a 10×12 structure vary significantly between cities like Salt Lake City, Provo, and St. George.
- Check Local Codes: Rules on size, height, and property line setbacks differ everywhere. An attached pergola often requires a permit because it connects to your home, while a freestanding one may not.
- Consult Your HOA: If you live in a community with a Homeowners Association, you will likely need their approval in addition to any city permits. HOAs have their own rules regarding aesthetics, materials, and placement.
Our best advice: Always check with your local building department and HOA before you buy or install your kit to avoid costly issues later.
How do I maintain my pergola?
Maintenance depends on the material:
- Wood Pergolas: Require the most care. Plan to stain or seal the wood every 1-3 years to protect it from Utah’s intense UV rays and freeze-thaw cycles. Also, periodically check and tighten any loose hardware.
- Vinyl and Metal Pergolas: These are low-maintenance. A simple wash with soap and water a few times a year is usually all that’s needed to remove dust and pollen.
- Fabric Canopies: Follow the manufacturer’s cleaning instructions. To extend their lifespan, remove canopies during heavy winds or snow.
Regardless of material, a quick seasonal inspection for wear or loose connections is always a smart practice.
What should I know about wood quality and ‘checks’?
When you buy a wood pergola kit 10×12, you may notice small cracks along the grain. These are called “checks” or “splits,” and they are a natural characteristic of wood, not a defect.
Wood expands and contracts with changes in moisture and temperature. Checks appear when the outer surface of a timber dries faster than its inner core, creating tension that the wood relieves by cracking. This is completely normal, especially in larger posts and beams made from species like pressure-treated Southern Yellow Pine.
Crucially, checks rarely affect the structural integrity of the pergola. While they may seem dramatic, they are typically a surface-level aesthetic feature that adds to the wood’s rustic character. If a check exposes unstained wood, simply apply some sealant to that area to keep it protected. For more guidance, our Pergola Installation A Beginners Guide is a great resource.
Conclusion: Find Your Perfect 10×12 Pergola Kit
A pergola kit 10×12 is an excellent investment, adding beauty, shade, and value to your home. By understanding the differences in dimensions, materials, and styles, you can confidently select a kit that fits your budget and backyard vision. Whether you prefer the natural charm of wood, the low-maintenance ease of vinyl, or the modern look of metal, the 10×12 size offers a perfect balance of space and function for any Utah home.
For expert advice and a curated selection of high-quality outdoor living products built to withstand Utah’s climate, the team at Utah Deck Supply is ready to help you create the backyard of your dreams.
Explore our full range of Pergola Kits